MSR&LHA color logo

Climax Restoration Project

Summary of the March 3-4, 2007 Work Session

What a productive weekend: ten volunteers dove in head-first and accomplished a great deal. Though we overslept and got a late start in the morning, we made up for it by several of us working until 11:30 in the evening.

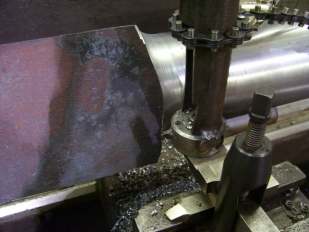
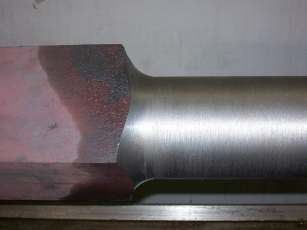
Finished square shaft transition
The first of the new square shaft forgings to be machined.  At this time the round shank has been cut to finished diameter, and the previously roughed transition has been turned to a smooth radius, using a home-made attachment for making cuts of this nature (see next two photos).  (Photo by Grady Smith).

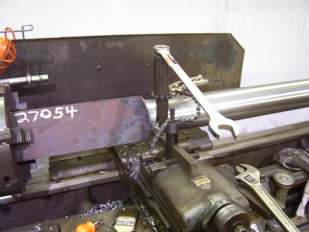
Tool for cutting square shaft radius
Homemade tool for cutting the radius on the square shaft transition.  The tool is rotated by hand to take a very small cut in each pass.  (Photo by Andy Fitzgibbon).

Tool for cutting square shaft transition
Another view of the radius cutting tool.  The two wrenches are used to allow smooth rotation of the tool.  (Photo by Andy Fitzgibbon).

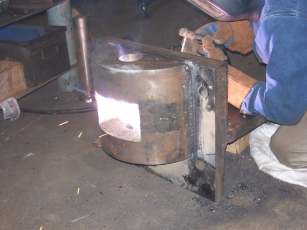
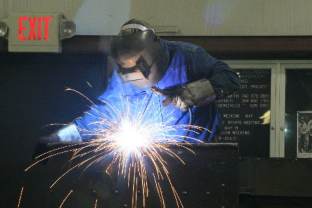
Welding the new draw-bar pocket
Welding on the new draw-bar pocket fabrication that will closely duplicate one of the original casting that was evidently destroyed in the smash-up of 1939 that wrecked many components on the tank frame and rear truck. (Photo by Grady Smith).

Welding the draw-bar pocket
Another view of the draw-bar pocket being welded.  The torch was used to heat the piece to reduce the liklihood of the large metal components warping while they were being welded. (Photo by Richard Sparks).

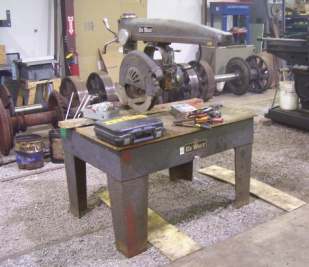
Recycled radial arm saw
The 16" radial arm saw that was scavenged from a dumpster.  (Photo by Andy Fitzgibbon).

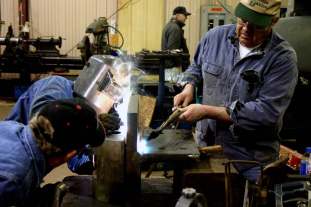
Welding the coal bunker trim strip
Welding the seam between the coal bunker's trim strip and sheet metal .  This was done to seal the seam and prevent wather infiltration.  (Photo by Walter Scriptunas, II).
Square Shafts

The bulk of the lathe work on the first forging was nearly finished: the shank has been finished to 4.5 inches diameter, and the transition radius has been done as well. Also, the end of the round shank has been rough turned to accept the horn casting. If it were not for the fact that the hole in the horn casting needs to be slightly bored to make it round (and truly measurable) this task would have been completed as well.

Andy Fitzgibbon posted additional photos of the square shaft machining on the PracticalMachinist.com Web site.


Coal Bunker

Changes to the rivets holding the half-round trim strip around the upper edge of the bunker have been completed. The round head rivets showing to the outside were removed, and the rivet heads were placed on the inside of the bunker, where they will not be seen. The old rivets were removed, the outer ends of the holes countersunk (shaped like a funnel), and the new rivets pounded into these recesses. The excess rivet material was VERY carefully sanded away, leaving a very clean look to the previously warty-looking trim strip.

The top edge where the bunker plate and the trim strip join was then welded over to seal out water and coal slack, in order to reduce corrosion. This weld was then sanded off smooth and pretty.

The sanding away of the excess rivet and weld material was a very touchy job that required lots of patience, and skill. The trick was to remove only material that was protruding above the surface of the trim strip, not any of the trim strip itself. Heavy handedness would have caused the contour of the trim strip proper to be cut, and become wavy, which would show badly when painted.

A very excellent job was done that will look nice when painted.


Draw-Bar Pocket

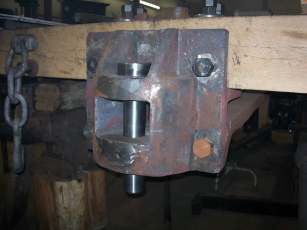
The object to this project is to replace a pocket that was ruined in the 1939 rear-end collision that did much major frame and truck damage. The trashed pocket was replaced by a casting that did not match the remaining half of the set-up. Ultimately the mismatching of the pockets caused a lot of erosion, over time, to the original factory unit (see photos). The incorrect replacement has been put aside, and will be replaced by our new fabrication.

Admittedly, this project has been languishing for some time. due to the fact that we have not had a welder that could concentrate on this project without interruptions. The individual parts of the puzzle have been laying around for months, but this weekend a welder appeared, unannounced, just for a visit, and we put him to work, fed him, and gave him a place to sleep. He had so much fun contributing to the joint effort of the restoration that he has vowed to return in two weeks.

When we took the locomotive apart, there was so much wear in the pockets, draw-bar, and pins that there was six inches of slack in the assembly. When rebuilt, the slop should be less than 3/4 inch.


Radial-Arm Saw

A 16-inch DeWalt radial-arm saw was acquired from a dumpster. It was so large and heavy that we had to retrieve it in sections, after taking it apart in the dumpster. To our good fortune, it turned out not to have been damaged when it fell into the dumpster. After a few hours of inspection, cleaning, lubricating, and re-assembly the machine works very nicely. It even runs! After sharpening the blade and constructing a new work table, it will come in very handy in the cutting the deck boards for covering the tank frame.


Next Work Party: March 17-18, 2007

Return to the Climax Restoration Project page

Return to the MSR&LHA Home page

Page last updated or validated on November 28, 2008


Rebuilt draw-bar pocket used as a modelThe draw-bar pocket that the new fabrication is duplicating.   Though not destroyed, this pocket was also cracked in the crash of 1939, but went undetected until it was sent away for welding up of some severely erroded areas.  The shiny areas were built up, then ground to finish contour.  (Photo by Grady Smith).

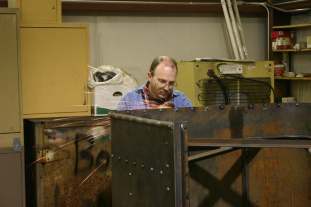
Grinding rivets on the coal bunker
Grinding rivets on the coal bunker.  Note that the rivets holding the top trim strip are set from the inside.  The rivet bottoms were countersunk and ground smooth to give the trim strip a more finished look.  (Photo by Richard Sparks).